A lawn mower’s solenoid is a crucial component, acting as an electromagnetic switch that controls the flow of power to the starter motor. A malfunctioning solenoid can leave you with a frustratingly immobile mower, preventing you from maintaining your pristine lawn. This beginner’s guide will walk you through the process of testing your lawn mower’s solenoid, enabling you to diagnose the problem and get your mower back up and running. We’ll cover everything from locating the solenoid to interpreting test results and even replacing the faulty part if necessary.
Contents
- Understanding Your Lawn Mower Solenoid
- Identifying the Solenoid Location
- Gathering Necessary Testing Tools
- Safety Precautions: Before You Begin
- Visual Inspection: Checking for Damage
- Testing the Solenoid’s Continuity
- Checking the Solenoid’s Coil Resistance
- Testing the Solenoid’s Power Supply
- Interpreting Test Results: Pass or Fail?
- Replacing a Faulty Solenoid: A Guide
Understanding Your Lawn Mower Solenoid
The solenoid is essentially an electrically controlled switch. It uses an electromagnet to engage a plunger, which in turn completes the circuit, allowing high current to flow to the starter motor. When you turn the ignition key, a small current flows through the solenoid’s coil, energizing the electromagnet. This attracts the plunger, closing the heavy-duty contacts that connect the battery to the starter motor, thus cranking the engine. Think of it as a powerful relay that handles the high amperage required by the starter. Understanding this basic function is key to effectively troubleshooting any issues. Without a functioning solenoid, the starter motor won’t receive the power it needs to turn over the engine.
Consequently, a faulty solenoid will prevent your lawnmower from starting. This can manifest in several ways, including a complete lack of response when you turn the key, a clicking sound from the solenoid itself, or a weak cranking sound from the starter motor. By understanding how the solenoid operates, you can better interpret the symptoms and effectively diagnose the problem. This knowledge will guide you through the testing process, allowing you to pinpoint the exact cause of your lawn mower’s starting problems.
Identifying the Solenoid Location
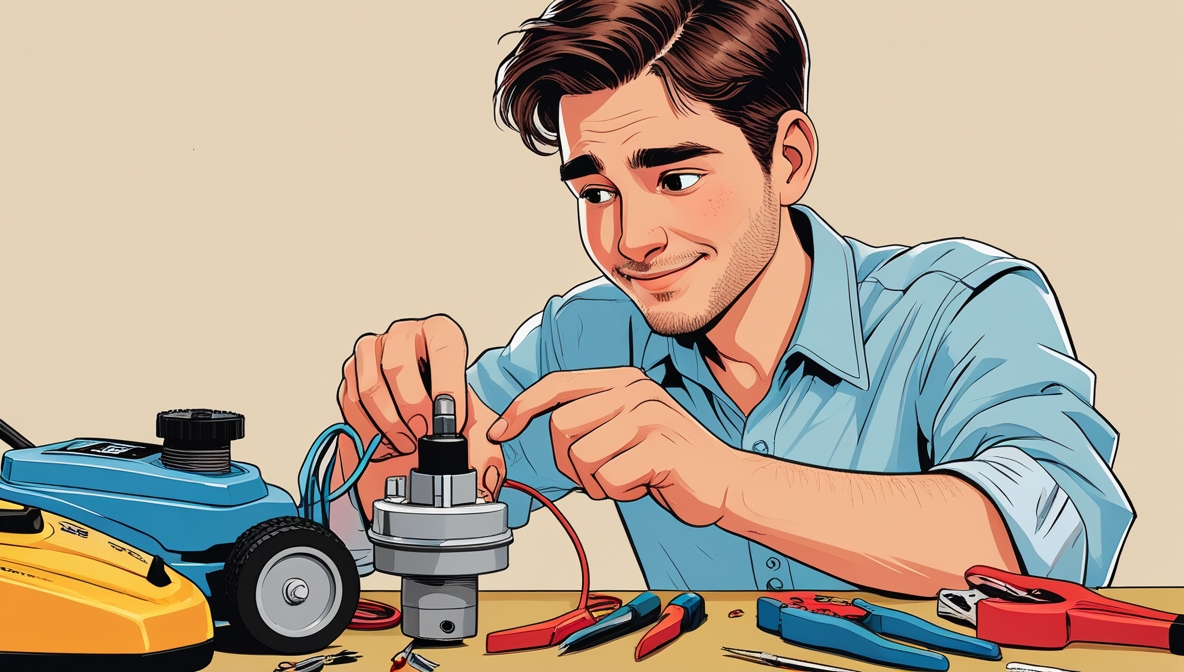
Locating the solenoid on your lawn mower is the first step in the testing process. Generally, the solenoid is a small, cylindrical device usually found near the starter motor and battery. It’s often attached directly to the starter or mounted nearby on the engine block. However, the exact location can vary slightly depending on the make and model of your lawn mower. Consult your owner’s manual for a diagram showing the location of all major components, including the solenoid. This manual provides valuable insight and will significantly speed up the identification process.
To locate it visually, look for a small metal cylinder with several heavy-gauge wires connected to it. These wires typically carry significant current, so look for thicker cables than those used for other electrical components. Sometimes, the solenoid is covered by a protective cover or shroud, which may need to be carefully removed to gain access. Remember to always disconnect the battery’s negative terminal before attempting any work on the electrical system to prevent accidental shocks or short circuits. Once identified, you can proceed to the next phase of testing.
Gathering Necessary Testing Tools
Before you begin testing your lawn mower solenoid, you’ll need a few essential tools. Firstly, you’ll need a multimeter, which is an indispensable tool for electrical testing. A multimeter measures voltage, current, and resistance, all of which are crucial for diagnosing solenoid problems. Make sure your multimeter is capable of measuring resistance in ohms and voltage in both DC and AC. Furthermore, a set of insulated jumper wires will be helpful for bypassing components during testing. These wires should be rated for the appropriate amperage to handle the current flow.
In addition to the multimeter and jumper wires, you’ll need some basic hand tools. These may include screwdrivers (both Phillips and flathead) to remove any covers or access panels. A pair of pliers might also be useful for disconnecting wire terminals. Finally, having a pen and paper to jot down your readings is always a good practice for easier comparison and record-keeping. Gathering these tools beforehand ensures a smooth and efficient testing procedure, minimizing interruptions and delays.
Safety Precautions: Before You Begin
Safety should always be your top priority when working with electrical components. Before you begin testing your lawn mower solenoid, always disconnect the negative terminal of your battery. This will prevent accidental short circuits and electrical shocks. Never work on the electrical system with the engine running. This is a critical safety measure that prevents serious injury. Always wear appropriate safety glasses to protect your eyes from potential hazards, such as flying debris or sparks.
Furthermore, ensure that the lawn mower is in a well-ventilated area to avoid the buildup of harmful fumes. If you’re unsure about any aspect of the testing process, consult a qualified mechanic or refer to your owner’s manual. Remember, safety is paramount, and taking precautions is essential to prevent accidents and injuries. By prioritizing safety, you ensure a safe and productive testing experience.
Visual Inspection: Checking for Damage
Before you start any electrical testing, perform a visual inspection of the solenoid. Look for any obvious signs of damage, such as burnt wires, melted plastic, or physical cracks in the solenoid casing. These visual cues can often indicate a problem. Check the wiring connections for any loose or corroded terminals. Corrosion can significantly impede the flow of electricity, leading to malfunction. Pay close attention to the wires connected to the solenoid; any significant damage might indicate a short circuit or a break in the wiring.
If you notice any significant damage, such as a severely burnt wire or a cracked casing, it’s highly likely that the solenoid is faulty and needs replacement. However, even if the visual inspection doesn’t reveal any obvious problems, it’s still crucial to proceed with the electrical tests to confirm the solenoid’s functionality. A visual inspection is a quick and easy first step, but electrical testing provides a more definitive diagnosis.
Testing the Solenoid’s Continuity
With the battery disconnected, use your multimeter to check the continuity of the solenoid’s contacts. Set your multimeter to the continuity setting (often symbolized by a diode or a bell). Touch the multimeter probes to the two large terminals on the solenoid. If the solenoid is good, the multimeter should beep, indicating a closed circuit. This signifies that the internal contacts are making good contact, allowing current to flow when the solenoid is energized. No beep indicates a break in the circuit, suggesting a faulty solenoid.
Remember to clean any corrosion or dirt from the terminals before testing to ensure accurate readings. A faulty connection can give a false negative reading. If the multimeter doesn’t beep, it could indicate a broken internal connection within the solenoid, requiring replacement. This test checks the physical connection between the large terminals, which is essential for the solenoid to function correctly. This is a simple but crucial test that quickly identifies a common problem.
Checking the Solenoid’s Coil Resistance
Next, test the resistance of the solenoid’s coil. Set your multimeter to the ohms setting. Touch the probes to the small terminals on the solenoid (these are usually smaller gauge wires). You should get a reading in ohms, typically ranging from a few ohms to several tens of ohms. The exact value will vary depending on the solenoid’s specifications. Consult your owner’s manual or the solenoid’s specifications if you can find them to verify the expected resistance range. A reading of zero ohms typically indicates a short circuit, while an infinitely high resistance indicates an open circuit—both are signs of a faulty solenoid.
A reading significantly outside the expected range indicates a problem with the solenoid’s coil. This test is essential because the coil is the electromagnet that activates the plunger, and any significant deviation from the expected resistance value suggests a malfunction in this crucial element. This test, combined with the continuity test, provides a comprehensive assessment of the solenoid’s internal components.
Testing the Solenoid’s Power Supply
Finally, test the power supply to the solenoid. Reconnect the battery. With your multimeter set to the DC voltage setting, measure the voltage at the small terminals of the solenoid while someone attempts to start the mower. You should read a voltage close to the battery’s voltage (typically 12V). A low or absent voltage reading suggests a problem with the wiring, ignition switch, or another component in the electrical circuit, not necessarily the solenoid itself. This step helps isolate whether the problem lies with the solenoid itself or the system supplying it with power.
If the voltage is present but the solenoid still doesn’t work, the problem is likely within the solenoid itself. Conversely, if the voltage is absent, you need to trace the wiring and check the other components in the circuit. This step is crucial for determining whether the solenoid is receiving the necessary power to operate correctly. This test distinguishes between a solenoid failure and a problem elsewhere in the electrical system.
Interpreting Test Results: Pass or Fail?
After completing all the tests, it’s time to interpret the results. If the solenoid passed all the tests—continuity test showed a closed circuit, coil resistance was within the expected range, and the power supply test showed the correct voltage—then the solenoid is likely functioning correctly. The problem lies elsewhere in the starting system, possibly the starter motor, battery, or wiring. You may need to test these components further to pinpoint the exact cause of the malfunction.
However, if any of the tests failed—no continuity, incorrect coil resistance, or lack of voltage at the solenoid—then the solenoid is likely faulty and needs to be replaced. Remember to always double-check your readings and ensure you’re testing the correct terminals before concluding that the solenoid is the problem. Accurate testing is crucial for avoiding unnecessary replacements and ensuring efficient troubleshooting.
Replacing a Faulty Solenoid: A Guide
Replacing a faulty solenoid is a relatively straightforward process. Begin by disconnecting the battery’s negative terminal. Then, carefully disconnect the wires from


