A well-maintained lawn is the envy of any neighborhood, and a crucial tool in achieving that enviable green expanse is the 3-point lawn rake. This versatile implement, often attached to a tractor or similar machinery, offers unmatched efficiency in tasks ranging from thatch removal to aeration. This beginner’s guide will walk you through every step, from assembling your rake to troubleshooting potential problems, ensuring you get the most out of this powerful landscaping tool.
Contents
- Understanding Your 3-Point Lawn Rake
- Assembling the Rake: A Step-by-Step Guide
- Preparing Your Lawn for Raking
- The Proper Technique for Effective Raking
- Removing Thatch and Debris Efficiently
- Aerating Your Lawn with the Rake
- Dealing with Difficult Patches of Grass
- Cleaning and Maintaining Your Rake
- Storing Your Rake for Optimal Lifespan
- Troubleshooting Common Raking Issues
Understanding Your 3-Point Lawn Rake
A 3-point lawn rake, also known as a landscape rake or a land plane, is a piece of agricultural equipment designed to be attached to a tractor’s 3-point hitch. This hitch system allows for easy connection and disconnection, offering flexibility and maneuverability. The rake itself typically consists of a sturdy frame, a series of tines (or teeth) that penetrate the turf, and a control mechanism to adjust the rake’s angle and depth. These tines vary in length and spacing depending on the specific model and intended use. Understanding these components is crucial for effective operation.
Moreover, different models offer varying features. Some may have adjustable tine angles, allowing for customized work on different types of lawns. Others may have a wider working width for increased efficiency. Before you begin, familiarize yourself with your specific rake’s manual to understand its unique features and limitations. This will ensure safe and effective operation.
Assembling the Rake: A Step-by-Step Guide
Before you begin raking, you must correctly assemble your 3-point lawn rake. First, carefully remove the rake from its packaging and inspect all parts for any damage. Next, consult your rake’s instruction manual for a diagram of the assembly process. This manual will provide specific instructions tailored to your model. Generally, you’ll begin by attaching the tines to the main frame, ensuring they are securely fastened.
Following this, you’ll connect the rake to your tractor’s 3-point hitch. This involves aligning the hitch pins with the corresponding holes on the rake’s frame. Securely insert the pins and ensure they are locked in place. Finally, adjust the lift arms on your tractor to raise and lower the rake as needed. Remember to always consult your tractor’s manual for safe operating procedures. Improper assembly can lead to damage or injury.
Preparing Your Lawn for Raking
Before you unleash the power of your 3-point lawn rake, it’s essential to prepare your lawn. Begin by thoroughly inspecting your lawn to identify areas needing attention. Note any particularly dense patches of thatch, bare spots, or areas with heavy debris. This pre-raking assessment allows for targeted raking and prevents unnecessary work. Furthermore, remove any large obstacles such as rocks, branches, or toys that could damage the rake or your tractor.
Subsequently, mow your lawn to a consistent height. This makes the raking process smoother and more effective. High grass can clog the tines, reducing efficiency. Ideally, mow a day or two before raking to allow the grass clippings to dry slightly. Dry grass is easier to remove and less likely to clog the rake. This preparation ensures optimal results and minimizes the risk of damage.
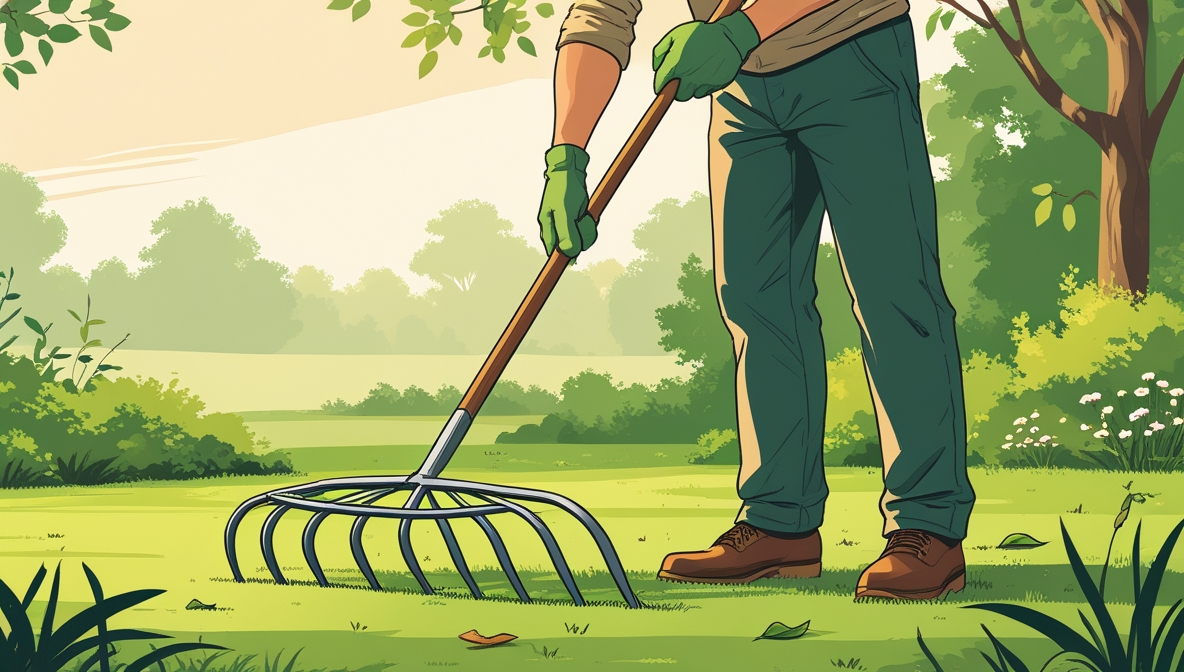
The Proper Technique for Effective Raking
Operating your 3-point lawn rake requires a delicate balance of speed and control. Begin by raising the rake to its highest position, then slowly lower it to the desired depth. Avoid aggressively forcing the rake into the ground, as this can damage the tines or your lawn. Instead, use the tractor’s hydraulics to control the depth and maintain a consistent working speed. This even pressure prevents scalping or uneven raking.
Moreover, overlap each pass slightly to ensure complete coverage. Avoid making sharp turns, which can damage the tines or cause uneven raking. Maintain a steady pace and observe the condition of your lawn as you rake. If you encounter areas of particularly dense thatch or debris, you may need to make multiple passes over those areas. Adjust your speed and depth accordingly.
Removing Thatch and Debris Efficiently
Thatch, a layer of dead and decaying organic matter, can suffocate your lawn. Your 3-point rake is ideal for removing this thatch. Begin by setting the rake to a shallow depth, allowing the tines to penetrate the thatch layer without damaging the healthy grass. Make overlapping passes across your lawn, collecting the thatch into windrows. These windrows can then be easily collected and removed. This method ensures thorough removal without causing significant soil disturbance.
Furthermore, the rake effectively removes other debris such as leaves, twigs, and small stones. As you rake, observe the collected material. If you notice a significant amount of debris, you may need to adjust the rake’s depth or make additional passes. Remember to regularly empty the collected material to avoid clogging the tines. Efficient thatch and debris removal promotes a healthier, more vibrant lawn.
Aerating Your Lawn with the Rake
Besides removing thatch, a 3-point lawn rake can also aerate your lawn. Aeration improves soil drainage and allows for better oxygen penetration, promoting healthier root growth. To aerate, set the rake to a slightly deeper depth than you would for thatch removal. The tines will penetrate the soil, creating small holes that improve aeration. Make overlapping passes to ensure thorough aeration across your lawn. This technique is particularly beneficial for compacted soil.
In addition, consider the timing of aeration. Aerating in the fall or spring is generally recommended, as this allows the lawn time to recover before the stresses of summer heat or winter cold. Avoid aerating during periods of drought or extreme weather. Proper aeration promotes a healthy, thriving lawn, leading to a more beautiful and resilient landscape.
Dealing with Difficult Patches of Grass
Inevitably, you’ll encounter challenging areas on your lawn. Densely compacted soil, for instance, requires a more cautious approach. Instead of aggressively forcing the rake through, make multiple, shallower passes over these patches. This minimizes the risk of damaging your lawn while still effectively removing thatch and debris. Adjusting the rake’s angle can also be beneficial in navigating these difficult areas.
Similarly, slopes present unique challenges. Work slowly and carefully on slopes, using the tractor’s hydraulics to maintain control. Avoid working on excessively steep slopes, as this can be dangerous for both you and your equipment. Always prioritize safety when working on uneven terrain. Patience and careful maneuvering are key to successfully raking challenging patches.
Cleaning and Maintaining Your Rake
Regular cleaning and maintenance are essential for extending the lifespan of your 3-point lawn rake. After each use, thoroughly clean the tines to remove any clinging debris. A stiff brush or pressure washer can be helpful in this process. Inspect the tines for any signs of damage or wear. Bent or broken tines should be repaired or replaced promptly. This prevents further damage and ensures effective raking.
Furthermore, lubricate any moving parts according to the manufacturer’s instructions. This helps prevent rust and ensures smooth operation. Store the rake in a dry, protected area when not in use. Covering the rake with a tarp or storing it in a shed will help prevent rust and corrosion. Proper cleaning and maintenance will keep your rake in top condition for years to come.
Storing Your Rake for Optimal Lifespan
Proper storage significantly impacts the longevity of your 3-point lawn rake. Before storing, thoroughly clean and dry the rake. Remove any accumulated dirt, debris, or moisture. This prevents rust and corrosion from developing during storage. Store the rake in a dry, well-ventilated area, away from direct sunlight and moisture. A shed or garage is ideal for this purpose.
Additionally, consider using a protective cover to shield the rake from the elements. This extra layer of protection will further prevent rust and corrosion. If storing the rake outdoors, ensure it’s elevated off the ground to prevent moisture buildup. By following these storage guidelines, you’ll help maintain the rake’s structural integrity and extend its operational lifespan.
Troubleshooting Common Raking Issues
Sometimes, problems arise during the raking process. If the rake is difficult to lower or raise, check the hydraulic fluid levels on your tractor. Low fluid levels can hinder the smooth operation of the hydraulics. If the tines are clogged, stop raking and clean them thoroughly. Accumulated debris can significantly impede the rake’s effectiveness. Addressing these issues promptly will ensure efficient and safe operation.
Moreover, uneven raking can result from improper adjustment of the rake’s angle or depth. Adjust these settings as needed to achieve a consistent result. If you encounter any persistent issues, consult your rake’s instruction manual or contact the manufacturer for assistance. Promptly addressing any problems prevents further damage and ensures the efficient and safe use of your equipment.
Mastering the use of a 3-point lawn rake elevates your lawn care to a new level of efficiency and effectiveness. By following the steps outlined in this guide, you can confidently tackle various lawn maintenance tasks, resulting in a healthier, more vibrant lawn. Remember that consistent maintenance and attentive operation are key to maximizing the lifespan and performance of your valuable equipment. Happy raking!


