A clogged pop-up sprinkler head can turn your perfectly manicured lawn into a patchy, dry mess. But don’t despair! Cleaning a pop-up sprinkler head is a surprisingly easy DIY job that can save you time and money. This guide will walk you through the process step-by-step, ensuring you get your sprinkler system back in tip-top shape in no time.
Contents
- Getting Started: Prep Work is Key
- Shutting Off the Water: Safety First!
- Uncovering the Sprinkler Head
- Removing the Head: Easy Peasy
- Cleaning the Screen: A Quick Rinse
- Inspecting for Debris: What’s Inside?
- Dealing with Clogs: Unblocking the Flow
- Reassembling the Sprinkler Head
- Testing Your Work: Does it Spray?
- Putting it All Back: Job Done!
Getting Started: Prep Work is Key
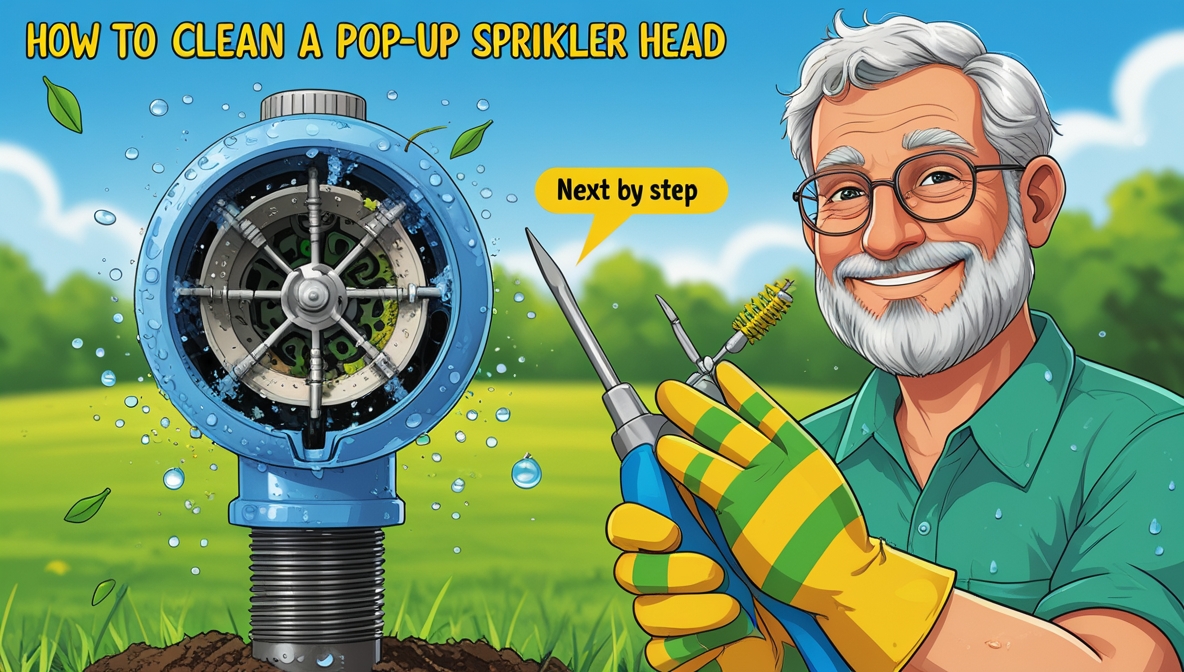
Before you even think about touching your sprinkler, gather your tools. You’ll need a screwdriver (likely a flathead, but check your sprinkler head), a bucket, a garden hose, and possibly some pliers or needle-nose pliers depending on the stubbornness of any clogs. It’s also a good idea to wear gloves to protect your hands from dirt and grime. Lay down some towels or a tarp to protect your lawn from scratches and potential water damage. A little prep work makes the whole process much smoother.
Next, locate the sprinkler head you need to clean. Identify any surrounding obstacles, like plants or rocks, that might interfere with your work. If you have multiple sprinkler heads, make a note of which one you’re working on to avoid confusion later. Consider taking a quick photo of the sprinkler head before you start disassembling it, this helps you remember how to put it back together.
Finally, make sure you have enough time to complete the job without rushing. A rushed job can lead to mistakes, and nobody wants to have to redo their work. Taking your time ensures a thorough cleaning and a properly functioning sprinkler head.
Shutting Off the Water: Safety First!
This is the most crucial step. Before you even think about touching the sprinkler head, turn off the water supply to that specific zone or the entire system. This prevents a sudden gush of water and makes the job much safer and cleaner. Locate your main water shut-off valve or the valve controlling the specific zone your sprinkler is in. It’s usually located near your water meter or in a central control box.
Turn the valve slowly and completely. Take a moment to double-check that the water is indeed off. You can do this by turning on the sprinkler head you’re about to clean – no water should come out. If water still flows, recheck the valve and ensure it’s properly closed. Safety is paramount, so don’t skip this step.
Once you’re confident the water is off, wait a few minutes to allow any residual water pressure to dissipate. This prevents any unexpected spurts of water during the cleaning process. This extra precaution will make the whole process much safer and more comfortable.
Uncovering the Sprinkler Head
Many pop-up sprinkler heads are partially or fully covered by grass or soil. Gently remove any grass, soil, or debris covering the top of the sprinkler head using your hands or a small trowel. Be careful not to damage the sprinkler head itself. A gentle approach is key here.
Once the area around the sprinkler head is clear, you’ll have a better view of how to proceed with the disassembly. Sometimes, a build-up of dirt and debris can make it difficult to identify the screws or other mechanisms needed to remove the head. Removing this debris will make the next steps easier and less frustrating.
Take a moment to assess the condition of the sprinkler head’s casing. Note any cracks or damage that you might need to address later. If the casing is severely damaged, you might need to replace the entire sprinkler head.
Removing the Head: Easy Peasy
Most pop-up sprinkler heads are held in place by a few screws or a simple twist-and-pull mechanism. Use your screwdriver to carefully remove any screws securing the head. If it’s a twist-and-pull mechanism, gently twist the head counterclockwise and pull it straight up. Avoid forcing anything; if it doesn’t come easily, re-examine the steps above to ensure you’ve prepared properly.
Once removed, you’ll have the sprinkler head in your hand. Set it aside carefully in your bucket. Be mindful of any small parts that might fall off during removal – these are important for reassembly. If you have a particularly stubborn sprinkler head, a pair of pliers might be helpful, but use caution to avoid damaging the head.
Take a moment to appreciate your progress! You’ve successfully removed the sprinkler head – you’re halfway there.
Cleaning the Screen: A Quick Rinse
The screen is typically located at the bottom of the sprinkler head and is often the primary culprit behind clogs. Use your garden hose to thoroughly rinse the screen, removing any dirt, debris, or sediment. A strong stream of water should dislodge most of the blockage. You can also use a small brush or toothpick to gently clean any stubborn particles.
If the screen is particularly dirty or clogged, you might need to soak it in a bucket of water with a mild detergent for a few minutes before rinsing again. Avoid using harsh chemicals as they could damage the sprinkler head. A thorough cleaning of the screen will ensure a smooth and even water flow.
Once the screen is clean and free of debris, set it aside to dry slightly before reassembly.
Inspecting for Debris: What’s Inside?
Once the screen is removed, take a look inside the sprinkler head. You might find pebbles, leaves, insects, or other debris that’s been blocking the water flow. Remove any visible debris using your fingers, pliers, or a small tool. Be gentle to avoid damaging any internal components.
Pay close attention to the internal passages of the sprinkler head. Sometimes, mineral deposits can build up and restrict water flow. If you see any mineral buildup, you may need a specialized cleaning solution or even a replacement part.
A thorough inspection will help you identify the root cause of the clog and prevent future problems.
Dealing with Clogs: Unblocking the Flow
If you find stubborn clogs that won’t come out easily, you might need to use a small wire or needle-nose pliers to carefully remove them. Be gentle to avoid damaging the internal components of the sprinkler head. If the clog is caused by mineral deposits, you might need to soak the sprinkler head in a solution of vinegar and water to dissolve them.
If the clog is persistent and you’re unable to remove it, you might need to replace the sprinkler head. Replacing a sprinkler head is usually a simple process, but always refer to the manufacturer’s instructions. Remember to always turn off the water supply before attempting any repairs.
Prevention is key! Regularly inspecting your sprinkler heads can prevent major clogs from forming.
Reassembling the Sprinkler Head
Carefully align the parts and reassemble the sprinkler head in the reverse order that you disassembled it. If you took a photo earlier, this is a great time to refer to it. Ensure the screen is securely in place before putting everything back together. Tighten any screws firmly but avoid over-tightening, which could damage the head.
Once reassembled, double-check that all parts are in place and secure before moving on to the next step. Make sure the sprinkler head sits flush with the ground. If there are any loose parts, you’ll need to disassemble and reassemble it again.
Taking your time during this step is crucial to ensure the sprinkler head functions correctly.
Testing Your Work: Does it Spray?
Turn the water supply back on slowly. Observe the sprinkler head carefully for any leaks or unusual water patterns. If the water sprays evenly and at the correct pressure, congratulations – you’ve successfully cleaned your pop-up sprinkler head!
If the water doesn’t spray correctly or you notice any leaks, you’ll need to re-examine the reassembly process. Check for any loose parts or incorrectly positioned components. If the problem persists, you might need to repeat the cleaning process or even replace the sprinkler head.
Testing your work is the final confirmation that your efforts have paid off.
Putting it All Back: Job Done!
Once you’re satisfied with the sprinkler’s performance, carefully replace any grass or soil that you removed earlier, ensuring the sprinkler head is level with the ground. Give the area a light watering to settle the soil and help the grass recover. Take a step back and admire your handiwork – a perfectly functioning sprinkler head, all thanks to you!
You’ve successfully cleaned your {title}! Remember to regularly check your sprinkler heads for clogs to prevent future issues. Regular maintenance can save you time, money, and a lot of frustration.
Pat yourself on the back, you’ve earned it.
Cleaning a pop-up sprinkler head is a simple task that can significantly improve your lawn’s health. By following these steps, you can easily maintain your sprinkler system and enjoy a lush, green lawn all season long. Remember, regular maintenance is key to preventing future problems and keeping your lawn looking its best.
