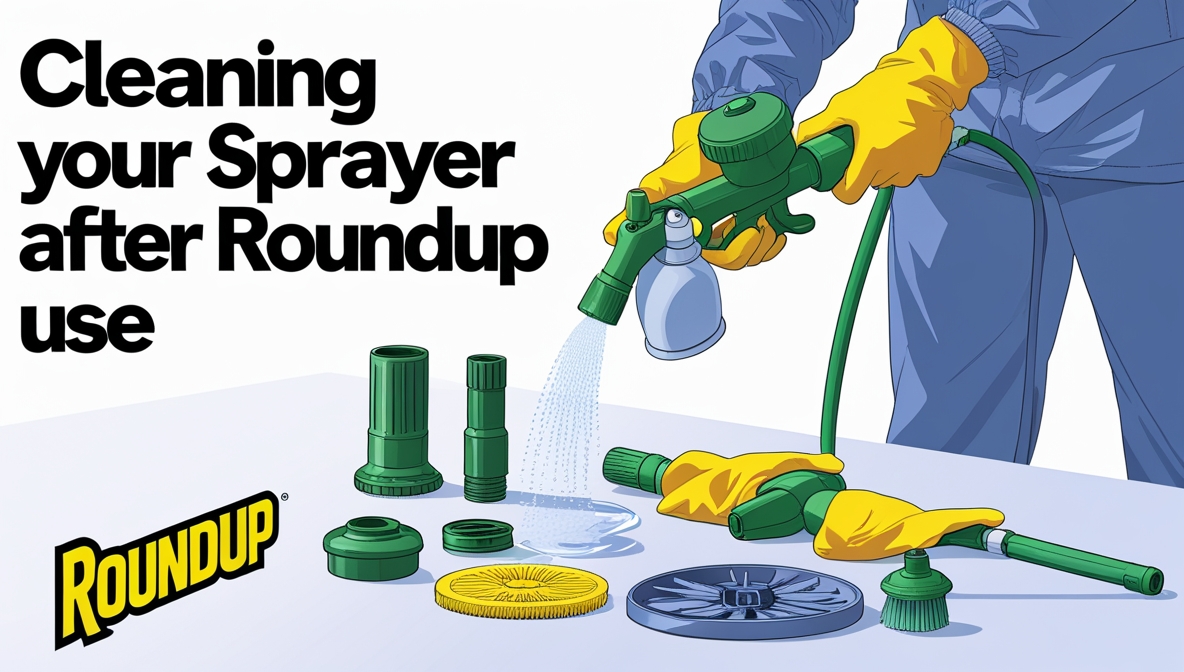
So, you’ve conquered the weeds with Roundup, but now you’re facing a new challenge: cleaning your sprayer. Don’t worry, it’s easier than you think! This guide will walk you through the process step-by-step, ensuring your sprayer is spotless and ready for its next use. We’ll cover everything from emptying the tank to proper storage, keeping safety at the forefront. Let’s get started!
Contents
Getting Started: Pre-Cleaning Prep
Before you even begin cleaning your {title}, gather your supplies. You’ll need plenty of clean water, a sturdy brush (an old toothbrush works great for hard-to-reach spots), some dish soap (a mild one is best), and maybe some rubber gloves for extra protection. Find a well-ventilated area, preferably outdoors or near an open window, to avoid inhaling any fumes. Lay down some newspaper or a drop cloth to protect your work surface from any spills. Preparation is key to a smooth and efficient cleaning process. This will save you time and hassle later on.
Having everything ready beforehand prevents interruptions and makes the whole process much more efficient. Remember that the quicker you clean your sprayer after using Roundup, the easier it will be to remove any residue. Don’t let it sit for days – the longer you wait, the more stubborn the residue becomes. Also, ensure you have enough water available; you’ll be using quite a bit during the rinsing process. Consider using a garden hose for easier rinsing, if available.
Finally, make sure you understand the specific cleaning instructions for your sprayer model. Some sprayers may have specific parts that require extra attention or different cleaning methods. Consult your sprayer’s manual if you have any doubts. Taking a few minutes to prepare will make the whole cleaning process much smoother and more effective.
Emptying the Tank: The First Step
The first step in cleaning your sprayer is completely emptying the tank. Pour the remaining Roundup into a designated container for proper disposal. Never pour Roundup down the drain or into the soil. Check your local regulations for proper disposal methods, as these can vary by region. Often, you’ll need to take it to a hazardous waste collection center.
Once the tank is empty, rinse it out with clean water. Give it a good swirl to loosen any remaining Roundup. This initial rinse removes a significant portion of the herbicide, making subsequent cleaning steps much easier. Don’t just rely on one rinse; this is the first step of a multi-step process. The more Roundup you remove at this stage, the less work you’ll have later.
Remember to remove any filters or screens from the tank before rinsing. These can trap Roundup residue, and thorough cleaning is needed to avoid clogging. Clean these parts separately, using a brush and water. Once the tank is mostly empty, you can proceed to the next step, which involves multiple thorough water rinses.
Rinse and Repeat: Multiple Water Washes
Now, it’s time for a series of rinses. Fill the tank completely with clean water and then empty it. Repeat this process at least five times. Each rinse will remove more of the Roundup residue. This step is crucial for eliminating any lingering herbicide. Don’t skimp on the number of rinses; the more you do, the cleaner your sprayer will be.
With each rinse, pay attention to the water’s color. Initially, the water will likely be slightly discolored due to the Roundup. As you continue rinsing, the water should gradually become clearer, indicating that most of the herbicide has been removed. If the water remains discolored after several rinses, you might need to add a cleaning agent (we’ll cover that later).
It’s helpful to use a garden hose for this step, if possible. The force of the water will help dislodge any stubborn residue clinging to the inside of the tank. If a hose isn’t available, thoroughly shake the tank during each rinse to maximize cleaning. Remember, thorough rinsing is the foundation of a clean sprayer.
Scrub-a-dub-dub: Cleaning the Nozzle
The nozzle is a critical part of your sprayer, and it often accumulates the most residue. Disassemble the nozzle if possible, following the manufacturer’s instructions. Use your brush to scrub the nozzle thoroughly, paying close attention to any small openings or crevices where Roundup might have accumulated. An old toothbrush is perfect for this task.
For stubborn residue, soak the nozzle in a solution of soapy water (more on this later) for a few minutes before scrubbing. This will help loosen the residue and make cleaning easier. Rinse the nozzle thoroughly under running water after scrubbing. Ensure all parts are completely clean before reassembling.
Once cleaned, carefully inspect the nozzle for any blockages or damage. If you find any issues, consult your sprayer’s manual or contact the manufacturer for assistance. A clean and functioning nozzle is crucial for even and efficient spraying.
Dealing with Stubborn Residue
If you’re still struggling with stubborn Roundup residue after multiple rinses, don’t despair. There are a few extra steps you can take. First, try using a mixture of warm water and a mild dish soap. The soap will help break down the residue and make it easier to remove. Fill the tank with this mixture, let it sit for a few minutes, then scrub thoroughly.
Another effective method is using a solution of white vinegar and water. Vinegar is a natural cleaning agent that can help dissolve stubborn residue. Use a ratio of about one part vinegar to two parts water. Fill the tank with this solution, let it sit for a while, and then rinse thoroughly. Always test a small, inconspicuous area first to ensure the vinegar doesn’t damage your sprayer.
If these methods fail, you might need to consult your sprayer’s manual for specific cleaning recommendations. Some sprayers may require specialized cleaning agents or more aggressive cleaning methods. Remember to always follow the manufacturer’s instructions carefully.
The Power of Soapy Water
A solution of mild dish soap and warm water is a powerful ally in cleaning your sprayer. The soap helps to emulsify the Roundup, breaking it down and making it easier to rinse away. It’s particularly effective at removing residue from the tank’s interior and the nozzle. Avoid using harsh detergents or abrasive cleaners, as these could damage the sprayer’s components.
To make the soapy water solution, simply add a small amount of dish soap to a bucket of warm water. The amount of soap needed will depend on the size of your sprayer and the amount of residue present. Start with a small amount and add more if necessary. Mix the solution thoroughly before using it to clean your sprayer.
After cleaning with the soapy water solution, rinse the sprayer thoroughly with clean water several times to remove all traces of soap. Residual soap can interfere with the sprayer’s performance in the future. Thorough rinsing is essential to ensure a clean and effective sprayer.
Final Rinse: Sparkling Clean Sprayer
After completing all the cleaning steps, give your sprayer one final, thorough rinse. Fill the tank with clean water, swish it around, and empty it. Repeat this process a couple of times to ensure all traces of soap and Roundup are gone. Pay close attention to the nozzle and any other hard-to-reach areas.
Check the water draining from the sprayer. It should be completely clear and free of any discoloration. If you still see any traces of Roundup or soap, repeat the rinsing process until the water runs clear. This final rinse is crucial for ensuring your sprayer is completely clean and ready for storage.
A sparkling clean sprayer is not only more efficient but also prevents any contamination of future applications. Take your time with this final rinse; it’s the last step to ensuring a perfectly clean sprayer.
Air Drying: Let it Breathe
Once you’ve completed the final rinse, allow your sprayer to air dry completely before storing it. This prevents the growth of mold or mildew inside the tank. If possible, leave the sprayer disassembled, allowing for better air circulation. This also makes it easier to ensure all parts are completely dry.
Air drying is a much safer and more effective method than using towels or cloths, which can leave behind lint or other debris. Find a well-ventilated area to allow your sprayer to dry thoroughly. Direct sunlight can also help speed up the drying process. Avoid storing a damp sprayer, as this can lead to corrosion or damage.
Depending on the size and complexity of your sprayer, air drying can take several hours or even overnight. Patience is key; don’t rush the drying process. A completely dry sprayer is less prone to damage and will be ready for use when you need it.
Proper Storage: Keeping it Ready
Proper storage is essential for maintaining your sprayer’s longevity and preventing contamination. Once it’s completely dry, reassemble your sprayer carefully, following the manufacturer’s instructions. Store it in a cool, dry place, away from direct sunlight and extreme temperatures.
Keep your sprayer clean and free of debris. A clean sprayer is less likely to develop problems and will be ready to use when you need it. Consider storing it in its original packaging or a protective case to prevent damage.
Regular maintenance, including cleaning after each use, will prolong the life of your sprayer and ensure it performs efficiently for many years to come. Proper storage is the final step in ensuring your sprayer remains in top condition.