Maintaining a healthy lawn or garden often depends on a well-functioning irrigation system. Pop-up sprinkler heads are a common component of many sprinkler systems, designed to rise above the ground when activated and deliver water efficiently to your landscape. Over time, however, these sprinkler heads can wear out, become clogged, or get damaged by lawnmowers, foot traffic, or harsh weather conditions. When this happens, replacing the sprinkler head is a straightforward task that most homeowners can tackle with a few basic tools and a little know-how.
In this comprehensive guide, we’ll walk you through the process of replacing a pop-up sprinkler head, from identifying the problem to testing your new installation. Whether you’re a seasoned DIYer or a first-time sprinkler fixer, this article will equip you with the knowledge and confidence to get the job done right.
Contents
Why Replace a Pop-Up Sprinkler Head?
Before diving into the replacement process, it’s worth understanding why a sprinkler head might need replacing. Pop-up sprinkler heads are exposed to the elements and regular use, making them prone to issues such as:
- Clogging: Dirt, debris, or mineral buildup can block the nozzle, reducing water flow or altering the spray pattern.
- Cracks or Breaks: Physical damage from lawn equipment or freezing temperatures can cause the head to leak or fail entirely.
- Wear and Tear: Internal components like seals or springs can degrade over time, leading to poor performance.
- Improper Spray: If the head no longer pops up fully or sprays unevenly, it may be beyond repair.
When cleaning or adjusting the sprinkler head doesn’t solve the problem, replacement becomes the best solution. Fortunately, pop-up sprinkler heads are inexpensive (typically $5-$20) and widely available at hardware stores or online.
Tools and Materials You’ll Need
To replace a pop-up sprinkler head, gather the following tools and materials:
- Replacement Sprinkler Head: Match the brand, model, and spray pattern (e.g., fixed, adjustable, or rotary) of your existing head for consistency. Common brands include Rain Bird, Hunter, and Toro.
- Shovel or Hand Trowel: For digging around the sprinkler head.
- Pipe Wrench or Pliers: To loosen the sprinkler head if it’s threaded tightly.
- Teflon Tape: To ensure a watertight seal on threaded connections (optional but recommended).
- Rag or Towel: To clean dirt and water from the area.
- Bucket or Container: To catch water and debris during removal.
- Garden Gloves: To protect your hands while digging.
- Sprinkler Riser (Optional): If the existing riser is damaged or incompatible with the new head.
- Screwdriver: For adjusting the new sprinkler head (some models).
Once you have your supplies ready, you’re set to begin the replacement process.
Step-by-Step Instructions
Follow these detailed steps to replace your pop-up sprinkler head efficiently and effectively.
Step 1: Turn Off the Water Supply
Safety first! Before working on your sprinkler system, shut off the water supply to avoid unexpected sprays or flooding. Locate the main shut-off valve for your irrigation system, typically found near your water meter or in an underground irrigation box. Turn the valve to the “off” position. If your system has a controller, ensure it’s powered off or set to “manual off” to prevent accidental activation.
Step 2: Locate and Assess the Damaged Sprinkler Head
Identify the sprinkler head that needs replacing. Look for signs of damage, such as water pooling around the base, an uneven spray pattern, or a head that doesn’t pop up properly. If your system has multiple zones, you may need to turn it on briefly (after isolating the zone) to confirm which head is malfunctioning. Once identified, mark the spot with a small flag or stake if necessary.
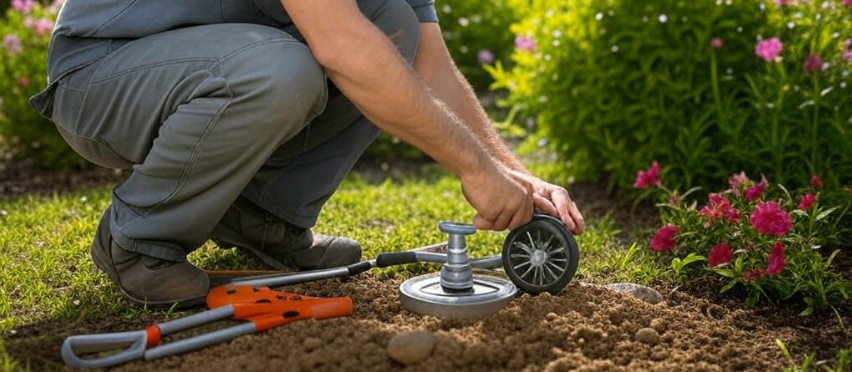
Step 3: Dig Around the Sprinkler Head
Using a shovel or hand trowel, carefully dig a circular trench around the sprinkler head, about 6-8 inches in diameter and 6-12 inches deep, depending on the head’s size and the depth of the riser. The goal is to expose the sprinkler head and its connection to the underground piping without damaging the surrounding turf or pipes. Dig slowly and gently to avoid cutting into the water line. Place the removed soil on a tarp or in a bucket for easy cleanup later.
As you dig, you’ll likely encounter some water in the hole—this is normal, as irrigation lines retain residual water. Use a rag or sponge to soak up excess water if it interferes with your work.
Step 4: Remove the Old Sprinkler Head
Once the sprinkler head is fully exposed, you’ll see how it’s attached to the system. Most pop-up sprinkler heads are either screwed directly onto a riser (a short vertical pipe) or connected via a fitting. To remove it:
- Threaded Connection: Grip the sprinkler head with your hand or a pipe wrench and turn it counterclockwise to unscrew it from the riser. If it’s stuck, apply gentle pressure to avoid cracking the riser.
- Snap-On Connection: Some heads use a snap-on mechanism. In this case, pull the head straight up or twist it slightly to release it from the fitting.
If the riser comes loose with the head or appears damaged (cracked, corroded, or stripped threads), you’ll need to replace it as well. Unscrew the riser from the underground pipe and take it with you to the store to find an exact match.
Place the old sprinkler head aside—you won’t need it unless you’re using it as a reference for purchasing the replacement.
Step 5: Prepare the Replacement Sprinkler Head
Before installing the new head, check that it matches the specifications of the old one. Look at:
- Spray Pattern: Fixed (e.g., quarter-circle, half-circle), adjustable, or rotary.
- Pop-Up Height: Common heights are 2, 4, or 6 inches—choose one that clears your grass or plants.
- Thread Size: Most risers use ½-inch or ¾-inch threads, so ensure compatibility.
If the new head has an adjustable nozzle, set it to the desired spray range using a screwdriver or the manufacturer’s instructions. Some heads come pre-assembled, while others may require you to attach a nozzle—follow the packaging guidelines.
For threaded connections, wrap a few layers of Teflon tape clockwise around the riser’s threads to ensure a tight, leak-free seal. This step is optional but highly recommended for older systems.
Step 6: Install the New Sprinkler Head
Attach the new sprinkler head to the riser or fitting:
- Threaded: Screw the head onto the riser by hand, turning it clockwise until snug. Use a pipe wrench or pliers for a final quarter-turn, but avoid overtightening, which can damage the threads.
- Snap-On: Align the head with the fitting and push or twist it into place until it locks securely.
Ensure the top of the sprinkler head sits flush with or slightly below ground level. If it’s too high, it could be damaged by mowers; if too low, it might not pop up effectively. Adjust the riser height if needed by adding or removing a section of pipe (this may require a trip to the hardware store).
Step 7: Backfill the Hole
With the new head installed, carefully refill the hole with the soil you removed earlier. Pack the dirt around the sprinkler head gently to hold it in place, but don’t compact it too tightly, as this could restrict the head’s movement. Smooth the surface and replace any sod or grass to restore the area’s appearance.
Step 8: Test the System
Turn the water supply back on and activate the sprinkler zone using your controller or by manually opening the valve. Watch the new sprinkler head in action:
- Does it pop up fully?
- Is the spray pattern correct and covering the intended area?
- Are there any leaks around the base?
If the spray pattern needs adjustment, use a screwdriver to tweak the nozzle (most adjustable heads have a small screw on top). For leaks, turn off the water, tighten the connection, or add more Teflon tape as needed.
Step 9: Final Adjustments and Cleanup
Once the sprinkler head is working properly, make any final adjustments to the spray radius or direction. Clean up your tools, dispose of the old head, and store any leftover materials. Congratulations—you’ve successfully replaced your pop-up sprinkler head!
Troubleshooting Tips
- Leaks Persist: Check the riser for damage or replace the O-ring/seal inside the head (if applicable).
- Head Won’t Pop Up: Ensure the water pressure is adequate and the head isn’t buried too deep.
- Uneven Spray: Clean the nozzle with a small brush or pin to remove debris.
Maintenance Tips to Prevent Future Issues
To extend the life of your new sprinkler head:
- Flush the system annually to remove debris.
- Adjust the head seasonally to account for plant growth.
- Winterize your system by draining it before freezing temperatures arrive.
Conclusion
Replacing a pop-up sprinkler head is a simple, cost-effective way to keep your irrigation system running smoothly. With basic tools, a replacement head, and about 30-60 minutes of your time, you can restore even water distribution to your lawn or garden. By following this step-by-step guide, you’ll not only save money on professional repairs but also gain a valuable skill for maintaining your outdoor space. So grab your shovel, roll up your sleeves, and get ready to sprinkle some life back into your landscape!