Maintaining a well-manicured lawn often involves more than just mowing. Grass trimmers, also known as weed whackers or string trimmers, are essential tools for tackling those hard-to-reach areas and achieving a professional finish. This beginner’s guide will walk you through the process of using a grass trimmer safely and effectively, from understanding its components to achieving a neat, polished look. Whether you’re a first-time user or looking to improve your technique, this comprehensive guide will equip you with the knowledge and skills needed to conquer your lawn care challenges.
Contents
Understanding Your Grass Trimmer
Grass trimmers come in various types, primarily distinguished by their power source: gas-powered, electric corded, and electric cordless (battery-powered). Gas-powered trimmers offer the most power and are ideal for large areas, but they require fuel and maintenance. Corded electric trimmers are lightweight and easy to use but are limited by cord length. Cordless trimmers provide convenience and portability, making them suitable for smaller yards. Regardless of the type, most trimmers share common components: the engine (or battery), the trimmer head, the shaft, and the control handles. Familiarize yourself with your specific model’s manual for detailed information on its features and operation. Understanding these parts will help you operate and maintain the trimmer effectively.
Furthermore, pay attention to safety features. Most trimmers include a safety switch to prevent accidental starting. Some also have a rotating shaft to allow for easier maneuvering around obstacles. Understanding these features and how they work is crucial for safe and efficient trimming. Take the time to read your owner’s manual carefully before attempting to use your trimmer for the first time. This will not only help you understand how your specific trimmer works, but will also highlight any unique safety precautions you need to be aware of.
Preparing for Safe Trimming
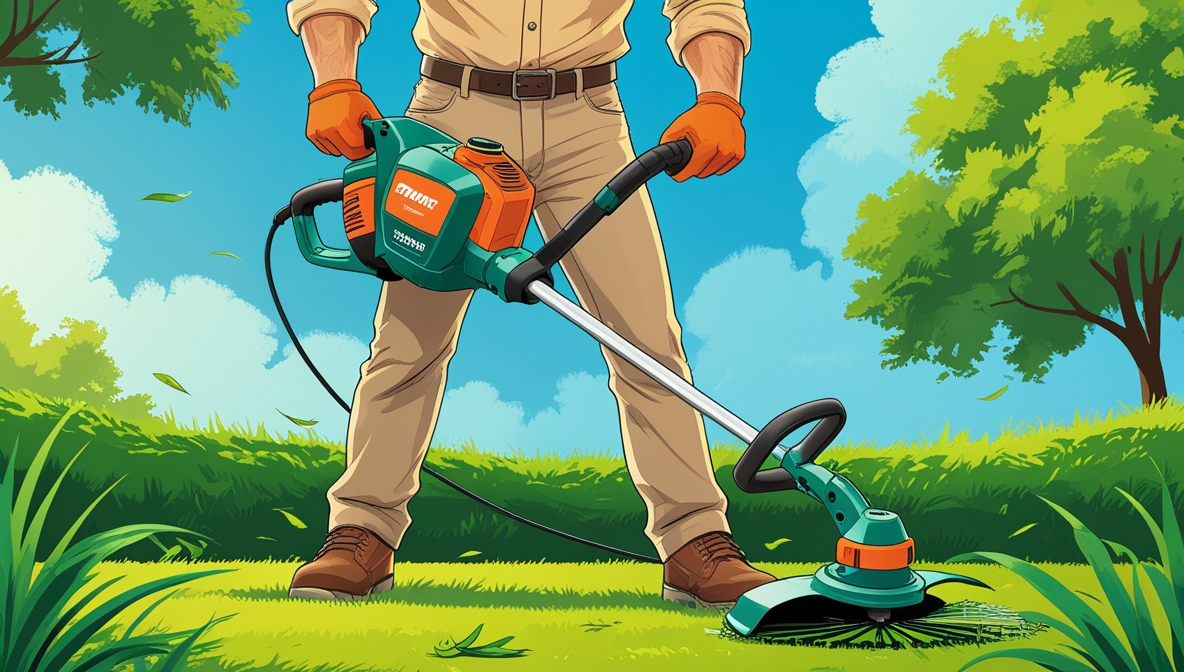
Before you begin trimming, prioritize safety. Always wear appropriate safety gear, including eye protection (safety glasses or goggles) to shield your eyes from flying debris, hearing protection (earplugs or earmuffs) to reduce noise exposure, and sturdy closed-toe shoes or boots to protect your feet. Long pants and sleeves are also recommended to protect your skin from accidental contact with the trimmer line or blade. Never operate the trimmer while wearing loose clothing that could get caught in the moving parts.
In addition to personal protective equipment, inspect your work area. Clear the area of any rocks, sticks, or other debris that could be thrown by the trimmer or damage the trimmer head. Be mindful of the location of any underground utilities or sprinkler heads to avoid accidental damage. Also, be aware of your surroundings and ensure that no pets or children are in the vicinity during operation. Careful preparation is key to a safe and productive trimming session.
Assembling the Trimmer Correctly
Many trimmers require assembly upon purchase. Carefully follow the manufacturer’s instructions provided in the owner’s manual. This typically involves attaching the trimmer head to the shaft, securing the shaft to the engine (or battery pack), and connecting any necessary guards or shields. Ensure all components are securely fastened before attempting to operate the trimmer. Improper assembly can lead to malfunctions, injuries, or damage to the trimmer.
Take your time and double-check each connection. Tighten all bolts and screws to the manufacturer’s specified torque. If you encounter any difficulties during assembly, consult the owner’s manual or contact the manufacturer’s customer service for assistance. A correctly assembled trimmer will operate smoothly and safely, enhancing your trimming experience.
Choosing the Right Line/Blade
Grass trimmers use either nylon line or metal blades. Nylon line is ideal for trimming grass and weeds, offering flexibility and the ability to maneuver around obstacles. Metal blades, on the other hand, are better suited for heavier-duty tasks, such as cutting through thick weeds or small saplings. The choice depends on your specific needs and the type of vegetation you’ll be trimming. Always use the correct type of line or blade recommended by the manufacturer for your specific trimmer model.
Furthermore, consider the thickness of the line or the sharpness of the blade. Thicker lines are more durable but require more power, while thinner lines are lighter and easier to use. A dull blade can be inefficient and more dangerous than a sharp one. Regularly inspect and replace your line or blade as needed to maintain optimal performance and safety. A sharp blade or fresh line will ensure clean cuts and prevent damage to the trimmer.
Adjusting the Trimmer Head
The trimmer head often allows for adjustments to the cutting line or blade. This may involve adjusting the length of the line, the angle of the head, or the tension of the line. Consult your owner’s manual for specific instructions on adjusting the head for your trimmer model. Proper adjustment ensures optimal cutting performance and prevents the line from becoming tangled or broken.
For example, you might need to adjust the angle of the trimmer head to trim under fences or along walls. You might also need to adjust the line length to ensure it’s long enough to cut effectively but not so long that it is prone to tangling or breaking. Regularly check and adjust the trimmer head as needed to maintain efficiency and safety.
Mastering the Trimming Technique
Begin by starting the trimmer according to the manufacturer’s instructions. Hold the trimmer firmly with both hands, maintaining a comfortable and balanced stance. Use a sweeping motion, moving the trimmer head from side to side, keeping the cutting line or blade parallel to the ground. Avoid pressing the trimmer too hard against the vegetation, as this can cause the line to break or the engine to stall.
Maintain a consistent pace and avoid jerky movements. Overlapping your trimming strokes ensures even cutting and prevents leaving patches of uncut grass or weeds. Practice makes perfect; with some experience, you will develop a smooth, efficient trimming technique. Remember to keep your body balanced and avoid overexertion.
Trimming Around Obstacles
Trimming around obstacles such as trees, fences, and flowerbeds requires careful maneuvering. Use short, controlled movements to avoid damaging the obstacles or yourself. Tilt the trimmer head to adjust the cutting angle as needed. Always maintain a safe distance from the obstacles to prevent accidental contact.
Take your time and work methodically. It’s better to make multiple passes around an obstacle than to rush and risk damage or injury. Use a combination of sweeping and precise movements to achieve a clean cut around obstacles. Remember to always maintain awareness of your surroundings.
Maintaining a Consistent Height
Maintaining a consistent height while trimming is crucial for achieving a neat and professional finish. Use the trimmer head as a guide, keeping it at a consistent distance from the ground. This will result in an even trim and prevent uneven patches. Practice maintaining a consistent height while trimming to develop a smooth and efficient technique.
If you are using a trimmer with an adjustable cutting height, use this feature to your advantage to ensure that you are cutting at the desired height. Regularly check your progress and adjust your technique as needed to maintain consistency. A consistently trimmed lawn creates a more polished and visually appealing appearance.
Achieving a Neat Finish
A neat finish involves attention to detail and careful trimming. Pay attention to the edges of your lawn and along walkways or driveways. Use short, precise movements to create clean lines and avoid leaving any stray grass or weeds. Take your time and carefully trim around any obstacles to create a seamless transition.
Consider using edging shears for a more precise finish along hard surfaces. This will create a sharper line between the lawn and the edge of the pavement. Regular trimming and attention to detail will result in a more refined and professional-looking lawn.
Cleaning and Storing Your Trimmer
After each use, clean the trimmer thoroughly. Remove any grass clippings or debris from the trimmer head and shaft. For gas-powered trimmers, empty the fuel tank and clean the air filter. For electric trimmers, wipe down the housing and ensure the charging port is clean and dry. Regular cleaning prevents build-up and extends the life of your trimmer.
Store your trimmer in a dry, safe place, away from children and pets. If storing for an extended period, consider adding fuel stabilizer to the gas tank (for gas-powered trimmers) and fully charging the battery (for cordless trimmers). Proper cleaning and storage will help ensure your trimmer remains in good working condition for years to come.
Mastering the art of grass trimming takes practice, but with patience and attention to detail, you can achieve a beautifully manicured lawn. Remember to prioritize safety, follow the manufacturer’s instructions, and practice consistently. By following the steps outlined in this guide, you’ll be well on your way to transforming your lawn from overgrown to impeccably trimmed. Happy trimming!


